Learning photography is just like solving a puzzle. With a photographer checklist, you can take one piece at a time and have fun doing it while you progress.
You have an idea of the picture, like the one on the front of a puzzle box. But you must put the pieces together to see the final result.
If you are reading this article and want to pursue this hobby or take it to the next level, this photographer checklist is for you. It will give you an overview of what’s involved in taking a quality photo before hitting the shutter button. Let’s get snapping!
Photographer Checklist
Get to Know Your Camera
To become a good photographer, you must understand each camera feature.
Whether you’ve just purchased a DSLR (Digital Single Lens Reflex), or a point-and-shoot, it pays to read the manual. Even the most basic camera has multiple features and settings that can help you take great shots.
Become a mad scientist and experiment with every function. Read the manual one little section at a time as you try each new button or setting.
TIP: Start with automatic mode if you’re a beginner. That way, you won’t need to worry about all the settings. Auto setup is a terrific way to capture quick, spur-of-the-moment shots, but it limits your creative control.
Once you are comfortable using the automatic mode, start experimenting with semi-automatic and manual modes to take your photography to the next level. Next, learn all about your camera’s lens to take pristine-quality pictures.

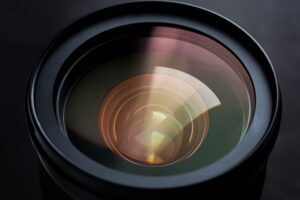
What is a camera lens? A camera lens is an optical device that focuses light onto the sensor in the camera’s body. The lens’s focal point determines the captured image’s size, shape, depth, and clarity.
There are four types of lenses, each with a specific purpose and how they focus the light.
- A wide-angle lens produces a wider, more distorted image than a telephoto. It is suitable for taking pictures of landscapes, cityscapes, and architecture.
- A standard lens will produce a standard image. It replicates the natural perspective of the human eye.
- A macro lens will produce sharp, detailed close-up photographs. This lens is specifically for photographing small close-up subjects, such as flowers, plants, insects, and products.
- Telephoto lenses are best for taking pictures of objects at a distance, such as wildlife or architecture.
There are three things to remember when using your lens.
First, make sure that it is clean. Dust and dirt can cause blurry images, so keep your lens clean to get sharp pictures.
Second, aim the camera at the correct angle for better impact. A high angle means you’re looking at the top of people’s heads and a low angle faces upward toward the sky. Other standard camera angles include eye-level shots, bird’s eye views, aerial shots, ground-level shots, and more.
Finally, remember that a good zoom lens will be better for beginners than a telephoto lens. A zoom lens lets you focus on subjects at varying distances without changing lenses. A telephoto lens is large, heavy, long, and expensive for extremely long shots. A camera lens can be plastic or glass. Plastic lenses are lighter, cheaper, and a good alternative for beginning photographers. Glass lenses are more expensive but have better optical qualities and scratch resistance.

Change Your Shutter Speed
As we explore shutter speed more in a future blog, you’ll learn further about how it dramatically impacts the look of your images.
Shutter speed implies the length of time your shutter stays open when your camera takes a photo. It’s measured in fractions of seconds, such as 1/60th or 1/250th. A faster shutter speed lets less light into the camera. It’s the setting you want for bright light situations or to capture moving objects.
Slow shutter speeds are ideal for nighttime or low-light shooting. However, with slower speeds comes a higher ISO setting, which can introduce noise into the image. ISO (International Organization for Standardization) sets the standard for a film’s sensitivity, but we’ll get into that in a moment.
As a beginner photographer, it’s crucial to test different shutter speeds to find your ideal settings for each type of situation in which you shoot.
Shutter exposure is when the camera’s shutter opens and closes to let in light. The shutter speed determines the shutter’s opening time, and the aperture (f-stop) controls how much light gets through.
The longer the shutter speeds, the more light gets through so that it will be a little brighter.
The smaller the f-stop number, the less light comes through, so that it will be darker.
If you want to control the depth of field, choose an aperture close to your subject’s focal length. To blur out your background and focus on your subject, use a short focal length or a wide aperture.
To get good exposure, you want to use a slow shutter speed (known as “long exposure”) that allows a more significant amount of light into the camera. However, if you want to freeze motion, use a fast shutter speed (known as “short exposure”).
What is ISO?
Another important consideration when setting your shutter speed is the “ISO” setting. The ISO refers to how sensitive your camera is to light. So if you set your camera to a high ISO, it will be more sensitive to light and capture more detail in dark areas of your photo. However, if you set it to a low ISO, it will be less sensitive and capture less detail in bright areas of your photo.
Therefore, when setting your shutter speed, you want to balance between these two factors:
- The amount of exposure (light allowed into the camera)
- The amount of detail you want to capture
If you’re shooting in automatic mode, your camera will choose a shutter speed based on your other camera settings. But if you take the plunge and start using semi-automatic or manual modes, you’ll have more control over your shutter speed.
Change Your Aperture
The aperture on your camera is one of the most critical settings. It affects the exposure value in one of two ways: decreasing the amount of light entering the camera or increasing it. The aperture reduces the quantity of light that enters the camera during low-light photography or increases the amount of light entering the camera during daylight or interior photography.
It’s also important to note that different lenses have different maximum apertures. If you have lenses with smaller maximum apertures, your images will have less depth of field and appear darker. Conversely, if you have lenses with larger maximum apertures, your pictures will have more depth of field and appear brighter.
Another thing to consider when adjusting your aperture is its effect on focus. It’s generally best to keep this setting as large as possible as it allows more light to enter the camera lens and helps keep your image sharp throughout the entire frame.
When changing your aperture, it’s important to remember that there are two different types of aperture: fully open and fully closed (also known as “f/0.”). When fully open, the aperture value equals the focal length value entered into the camera (e.g., f/0.8 would be 8mm). When fully closed, the aperture value is equal to half
Be Aware of Lighting Conditions
Photography is a form of art that allows your creativity to capture memories and moments you will cherish forever. But to take truly stunning photographs, you need a proper lighting conditions, white balance, and color temperature. These are all critical factors that can affect the quality of your photos.
Different types of light can create other effects in your photos. For example, natural light is often softer and more flattering than artificial light. So if you’re taking a portrait, it’s usually best to do so in natural light.
Another thing to be aware of is white balance. This is how your camera interprets different colors, which can significantly impact your photos. If you’re unhappy with how your pictures turn out, try changing your white balance and see if that makes a difference.
Finally, color temperature can also affect your photos. Different colors can give off different temperatures, affecting your photo’s overall mood. Try using warmer colors if you aim for a warm, cozy feeling. If you want a cooler, more refreshing feeling, use cooler colors.
Practice Makes Progress
Getting started in photography should be fun and rewarding. You don’t need a fancy camera or expensive equipment to take beautiful pictures. With the right attitude, a bit of practice, and these tips, you’ll soon be taking amazing photos that make Instagram influencers jealous!