When it comes to “photography tips for beginners” there are a variety of tips and articles from the internet. After sifting through many sites and hours or research, I chose the most valuable and sensible beginning photography tips and compiled them here for you.
How to Use Your Camera Settings

- camera settings
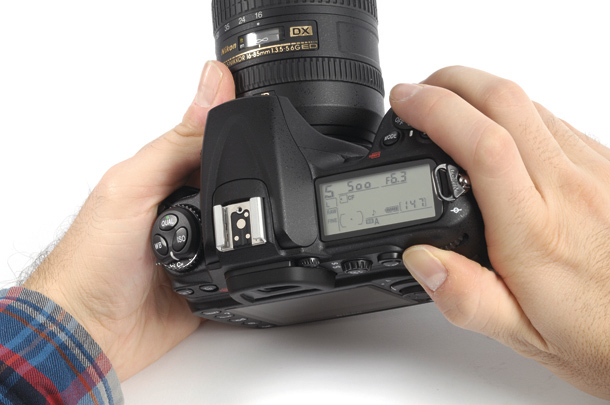
Read the manual, push every button, play with it but know your camera. This is the number one tip. Knowing how each setting on your camera affects your photograph is essential to taking great pictures. This is a two step process.
1) Read the manual. I know you hate to read a manual but it is the only way to really know what your camera is capable of.
2) Take pictures using each setting. It is best to use the same subject for comparison and have a notebook handy to write down the picture number and the setting. Then when you upload then to your computer you will have a very good idea of how your camera settings work.
Even so called “simple” compact cameras are loaded with features and settings. By understanding each camera setting you will take better pictures because you will know how to set up your camera for a variety of conditions.
For a more complete description of camera settings go our article “Camera Settings for Beginning Photographers”.
The best camera for you depends upon the kind of pictures you want to take
You need to decide what kind of pictures you really want to take. Do you like panoramic cityscapes or mountain ranges? do you like taking portrait pictures? Do you want to just have a pocket-sized camera handy just for taking record shots of your most recent trip?
Cell phones don’t take panoramic scenes and you do not need an expensive camera for some quick snapshots shots either. Some people can’t be bothered with setting up a camera with this aperture setting and that shutter speed. That just want to take a picture and have it come out right. Other people want to be able to see the hair on a bug’s butt and create a photo that is crystal clear. Different needs mean different cameras. Check out our “Compare Digital Cameras” page.
Photography Composition – make your picture a work of art

- photography composition
Learn the basics of how to arrange your picture. Putting your subject in the center does not necessarily make the best picture. There is something in photography called the “rule of thirds” which means that you divide your picture into thirds (vertically or horizontally). Think of a tic-tac-toe grid. Some cameras enable you to turn the grid on and off to help you compose your shot.
Composition Tips:
- Shoot your subject a little off center out of the bulls-eye.
- Use a plain background for medium and close up shoots.
- Avoid unnecessary objects intruding in the picture. When someone or something intrudes into the shot they call it “photo-bombing” and is the antithesis of a good portrait.
Photography Lighting Tips
Photography literally means “drawing with light.” Knowing where the light is, what kind of light it is and how the light affects your subject is one of the fundamentals of great photography. Something as simple as turning 90 degrees from the light source you can have a dramatic effect on your picture. Most digital SLR cameras have settings to compensate for different types of light such as bright sunlight, soft light and fluorescent light.

- photography lighting tips
Flash Photography
Part of understanding light is learning how and when to use a flash. The flash is meant to illuminate a dark surface. This may be used in a general low light setting but it is also used as “fill flash” to fill in the shadows on a bright sunny day. For example, if you are taking someones picture on a bright sunny day with the sun high in the sky and your subject’s back is toward the sun, their face will be in shadow. If you snap the picture everything around them and behind them will be perfectly exposed but the face will be in shadow. By setting your flash to “ON” it will automatically fire when you take the picture and remove the shadow. So flash is used in both bright and low light conditions.
This is a good source for further study.
Learn through Experimentation
Probably the biggest advantage of digital photography is that you can take a thousand pictures at no cost (sorry Kodak) so snap away and compare different, settings, lighting, angles and anything else you can try. Use a notebook to test various settings on a single subject while recording each setting and photograph number. This way you can compare and learn what each setting does and how it affects your final result. If you do not write them down you will definitely forget how you set your camera up.
This is a good time to set up “bracketing” in your camera. Bracketing is where you (or your camera) will take a series, usually, 3 shots at 3 different speeds or aperture settings to get the perfect shot. It is the same reason professional photographers take hundreds of shoots of the same model and pose, so they can be sure that they have at least one great shot.
Use a Camera Tripod
A tripod will help you get clear sharp photos while giving you time to compose your shots.
Anytime you are using macro for extreme closeups or you are taking low light pictures without flash you definitely need a tripod to keep the camera from shaking.Learn to use the self-timer to click the shutter for these kinds of shots because your finger can shake the camera even on a tripod.
Keep Your Camera With You.

- keep your camera, cant miss moment like this
It is better to have it and not need it then need it and not have it. You might just get that once in a lifetime shot if you just have your camera with you, besides, practice makes perfect. Need any more clichés?
We have more information here on 6 photography tips for beginners


